Electric Piano
MIT hosts an annual event called Campus Preview Weekend (CPW) for admitted students in April. During this event, student groups across campus will put on events to entice the pre-frosh to come to MIT (and maybe even join their group). In my dorm, Next House, I lead a student group called Next Make in which a group of people interested in electrical and mechanical projects come together to work on a project in their spare time. Next Make hosts a “Solder Your Own Circuit Board” event during CPW in which the club members design a PCB and have the pre-frosh come solder components to the board. Afterwards, they can take home a nice little PCB that they put together.
This year, we decided to make an electric piano with 8 pushbuttons as keys and a 555 timer to generate the tones. In addition, I added a potentiometer to tune the device and a photoresistor to create a pitch-bending, light-theremin effect. When switched on, the pitch bend allows the user to distort the sound by waving their hand over the photoresistor.
Circuit Link to heading
The circuit was a simple piano circuit that used a stack of resistors in series to create variable resistances that controlled the frequency output by a 555 timer.
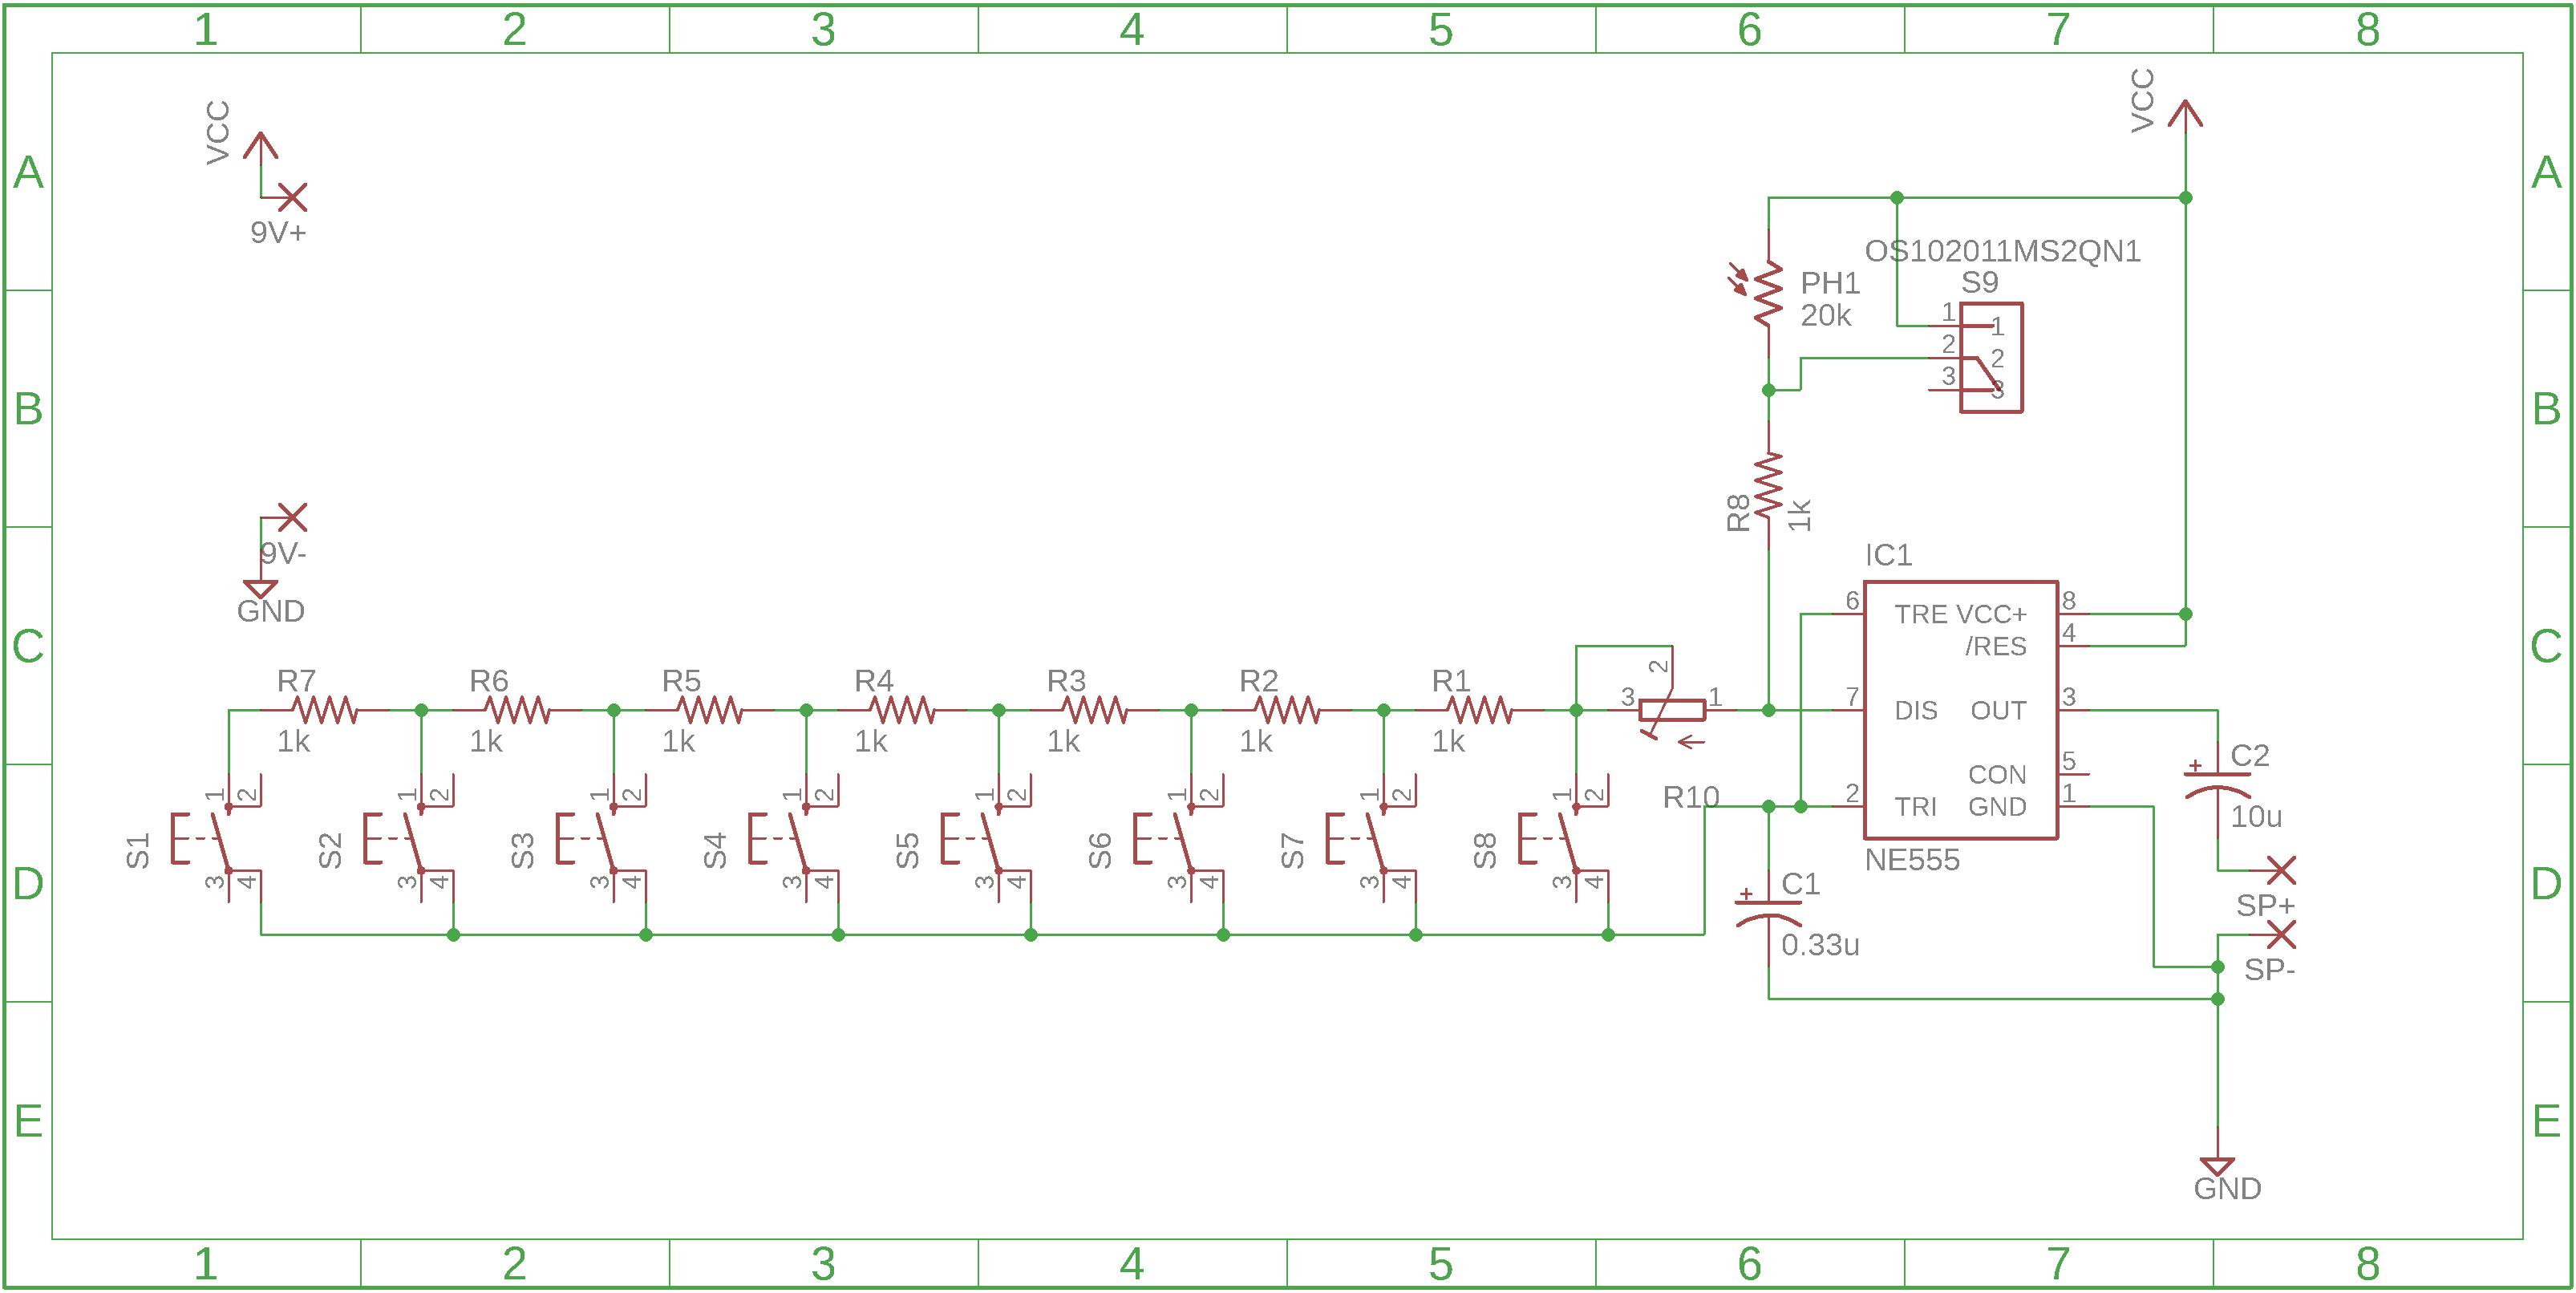
Piano circuit
PCB Layout Link to heading
I designed the PCB in Eagle and had it manufactured by PCBWay which had a surprisingly good turnaround time. I believe the PCBs arrived under a week from the time I ordered them. The immersion gold contacts on the black soldermask looked fantastic.
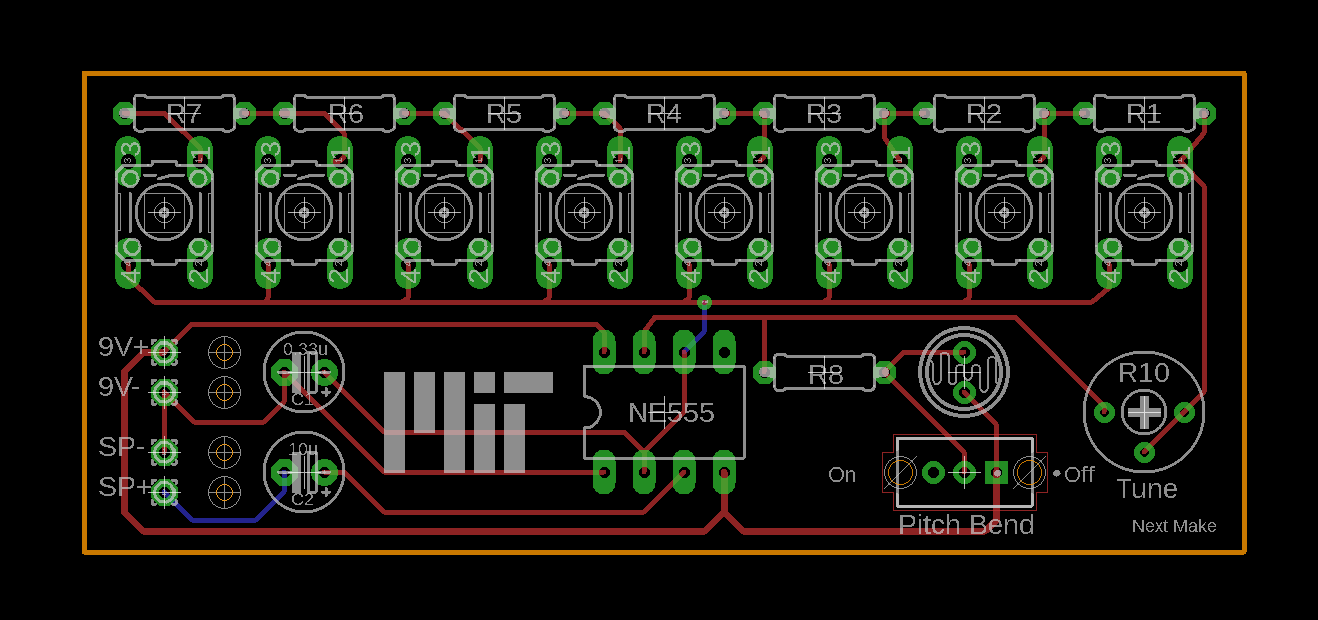
PCB Layout
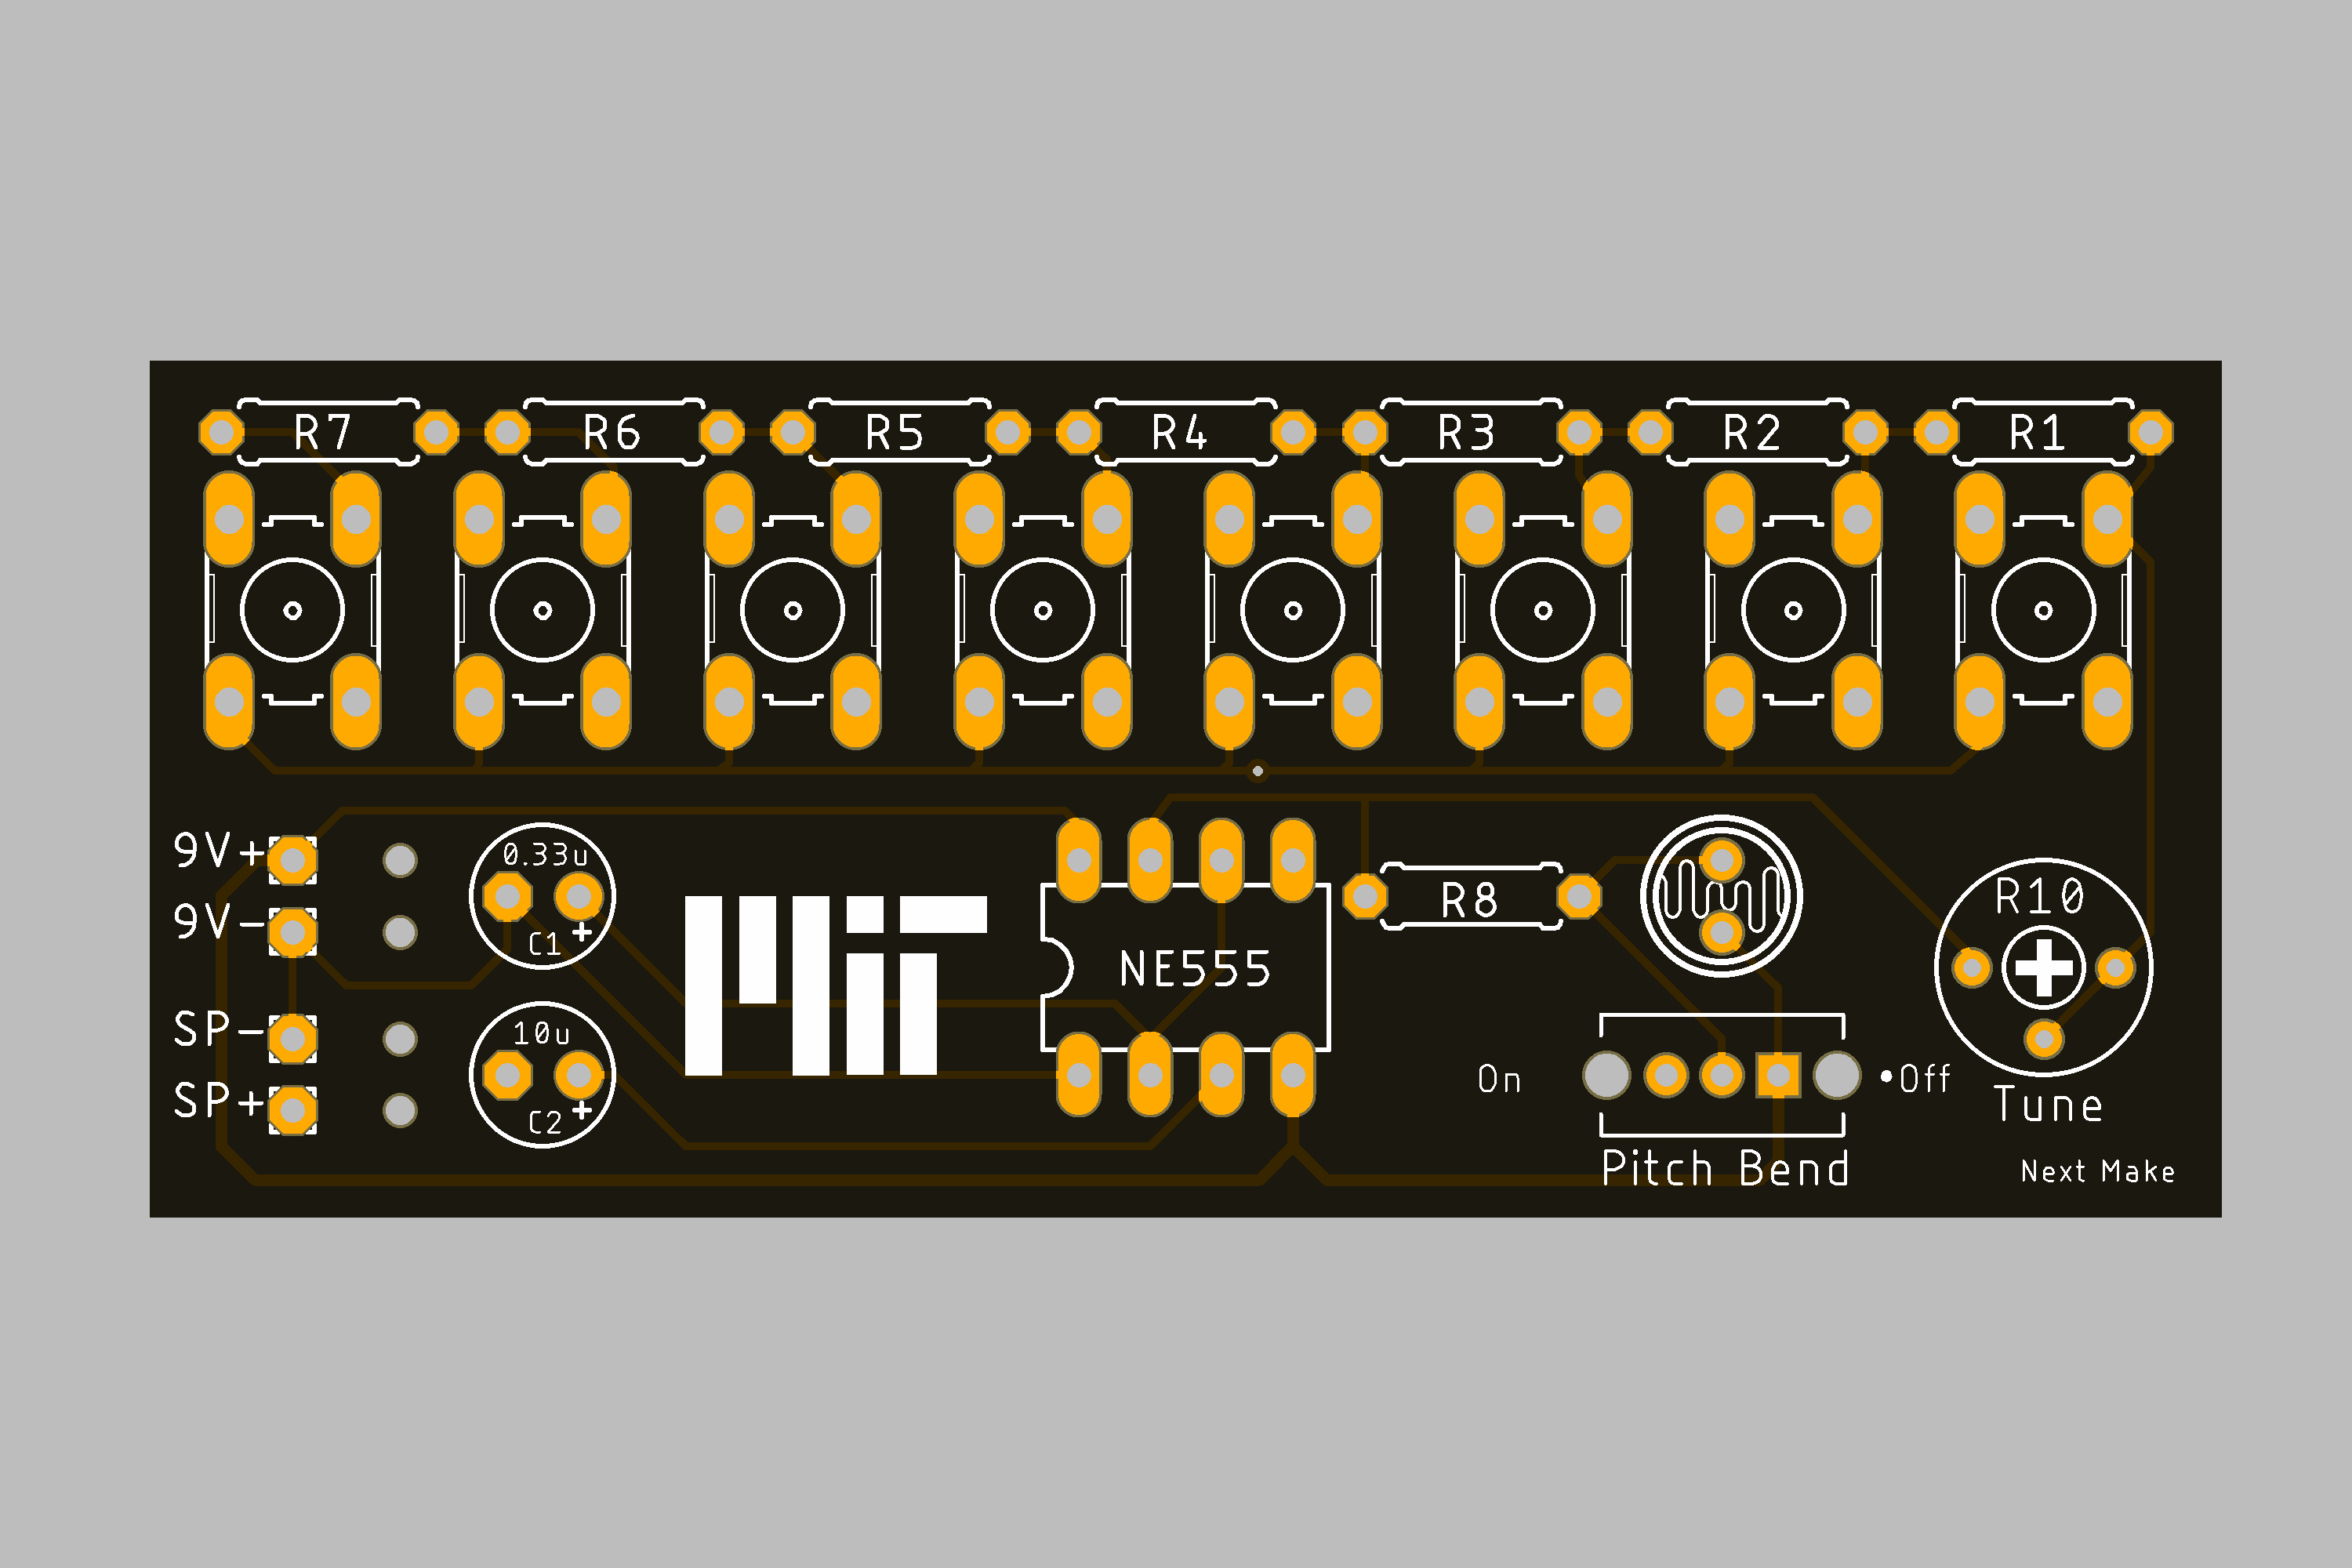
Eagle PCB Rendering
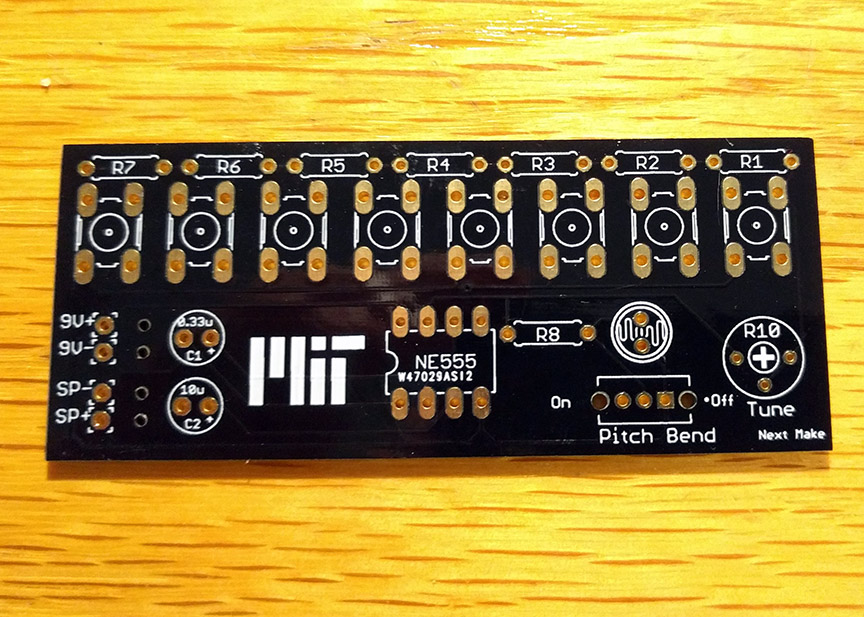
Final manufactured board